How To Upload Images To Cricut Design Space?
Want to know how to upload images to Cricut Design Space? You’ve come to the right place! One of the most powerful features of the Cricut Design Space is the ability to take your uploaded images and turn them into cuttable in any size and shape.
Whether you want to use your own designs, drawings, or family photos, learning how to upload images to Cricut Design Space allows you to create craft projects that are uniquely yours.
Be ready to learn about how to upload images to Cricut Design Space. We will discuss different types of images, what files you can use, and how to upload images to Cricut Design Space. We will also discuss some common problems you may encounter while uploading files.
Different Types of Images
There are two different types of images in the following: Basic images and Vector images.
- Basic images, also called raster images, have .jpg, .bmp, .png, and .gif file types. These files are uploaded as a single layer, and you can edit images during your upload procedure.
- Vector images have .svg and .dxf files. These cut-ready images are uploaded as per the design. Files created with layers will be automatically separated into layers after uploading and saving.
Below, select the platform to see step-by-step instructions for uploading basic and vector images to Cricut Design Space.
Steps To Upload Images To Cricut Design Space (Windows/Mac)
In order to upload images to Cricut Design Space, kindly follow the steps mentioned below:
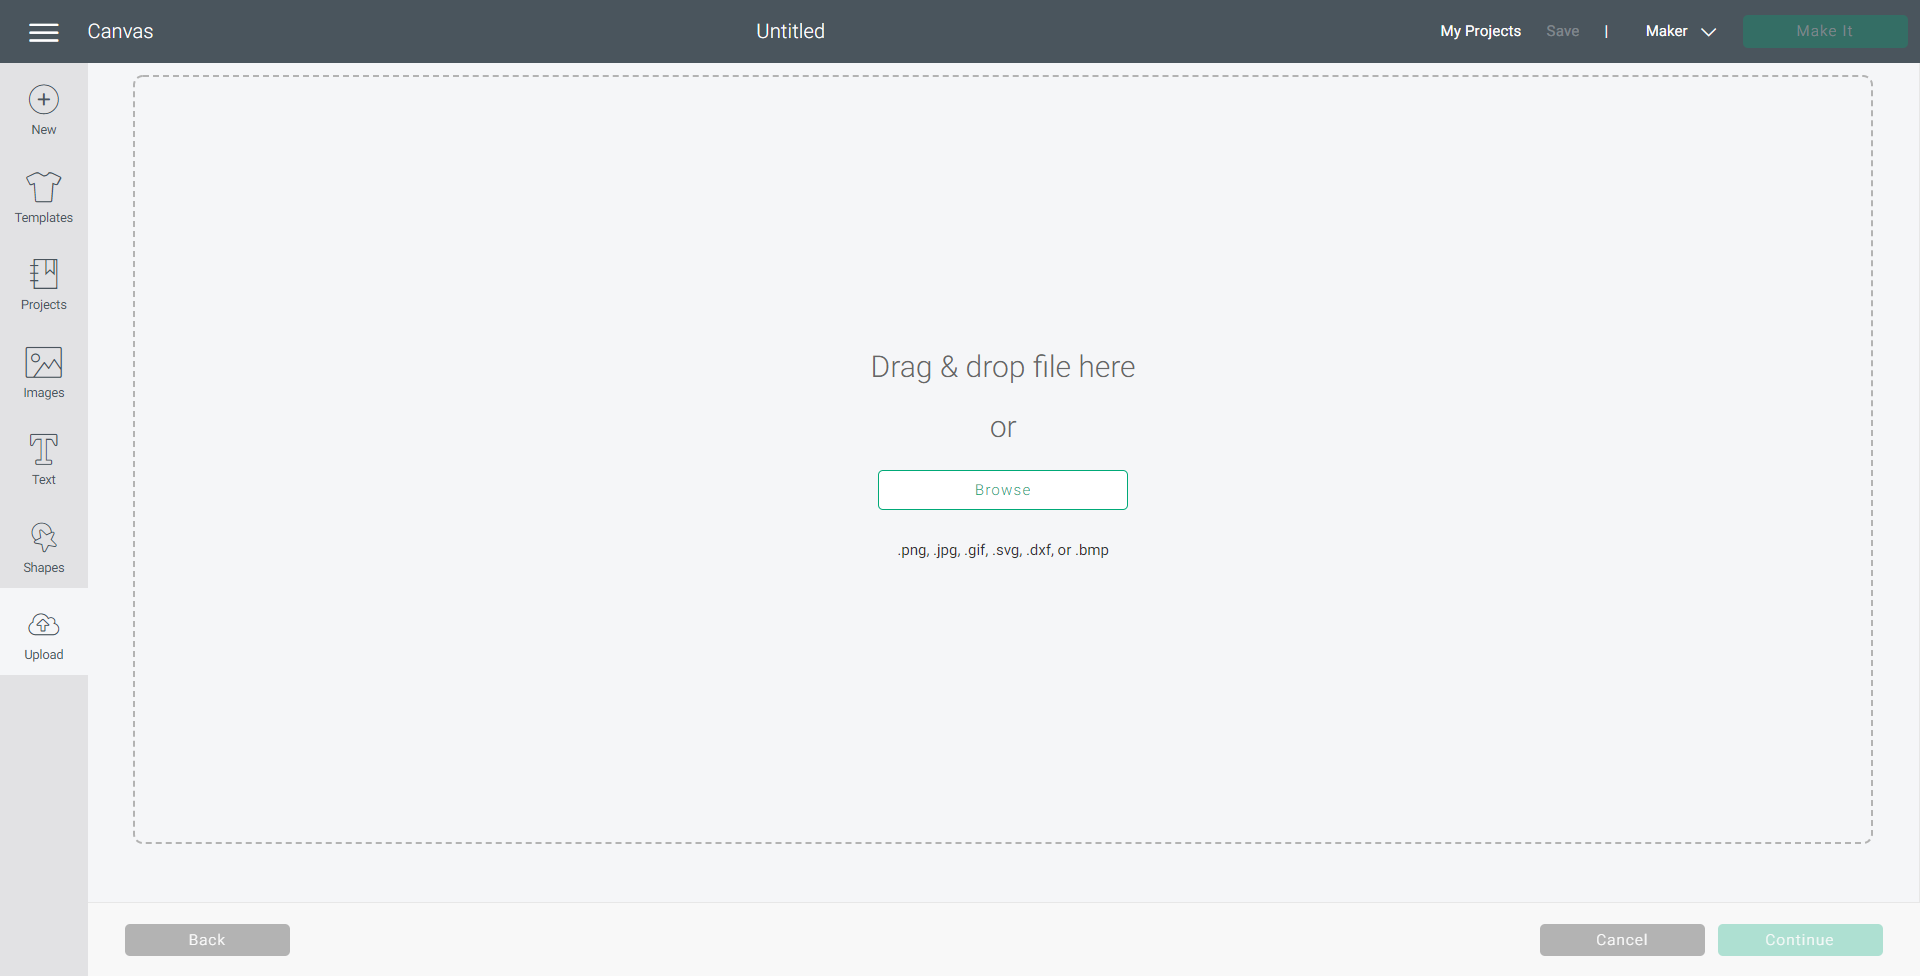
- First, select Upload on the design panel on the left side of the Canvas. Upload Image lets you work with basic image types including .jpg, .bmp, .png, and .gif image files as well as vector images including .svg and .dxf files. To start, choose Upload Image.


- Next, choose Browse to open your file selector and find the image you want to use from your PC, or just drag and drop your file into the upload window. You will be taken via the Basic image upload flow if you choose a .jpg, .gif, .png, or .bmp file. If you decide on .svg or .dxf, you will be taken via the vector image upload flow.
Option 1: Basic Image Upload
In order to upload images to Cricut Design Space, kindly follow the steps given below:
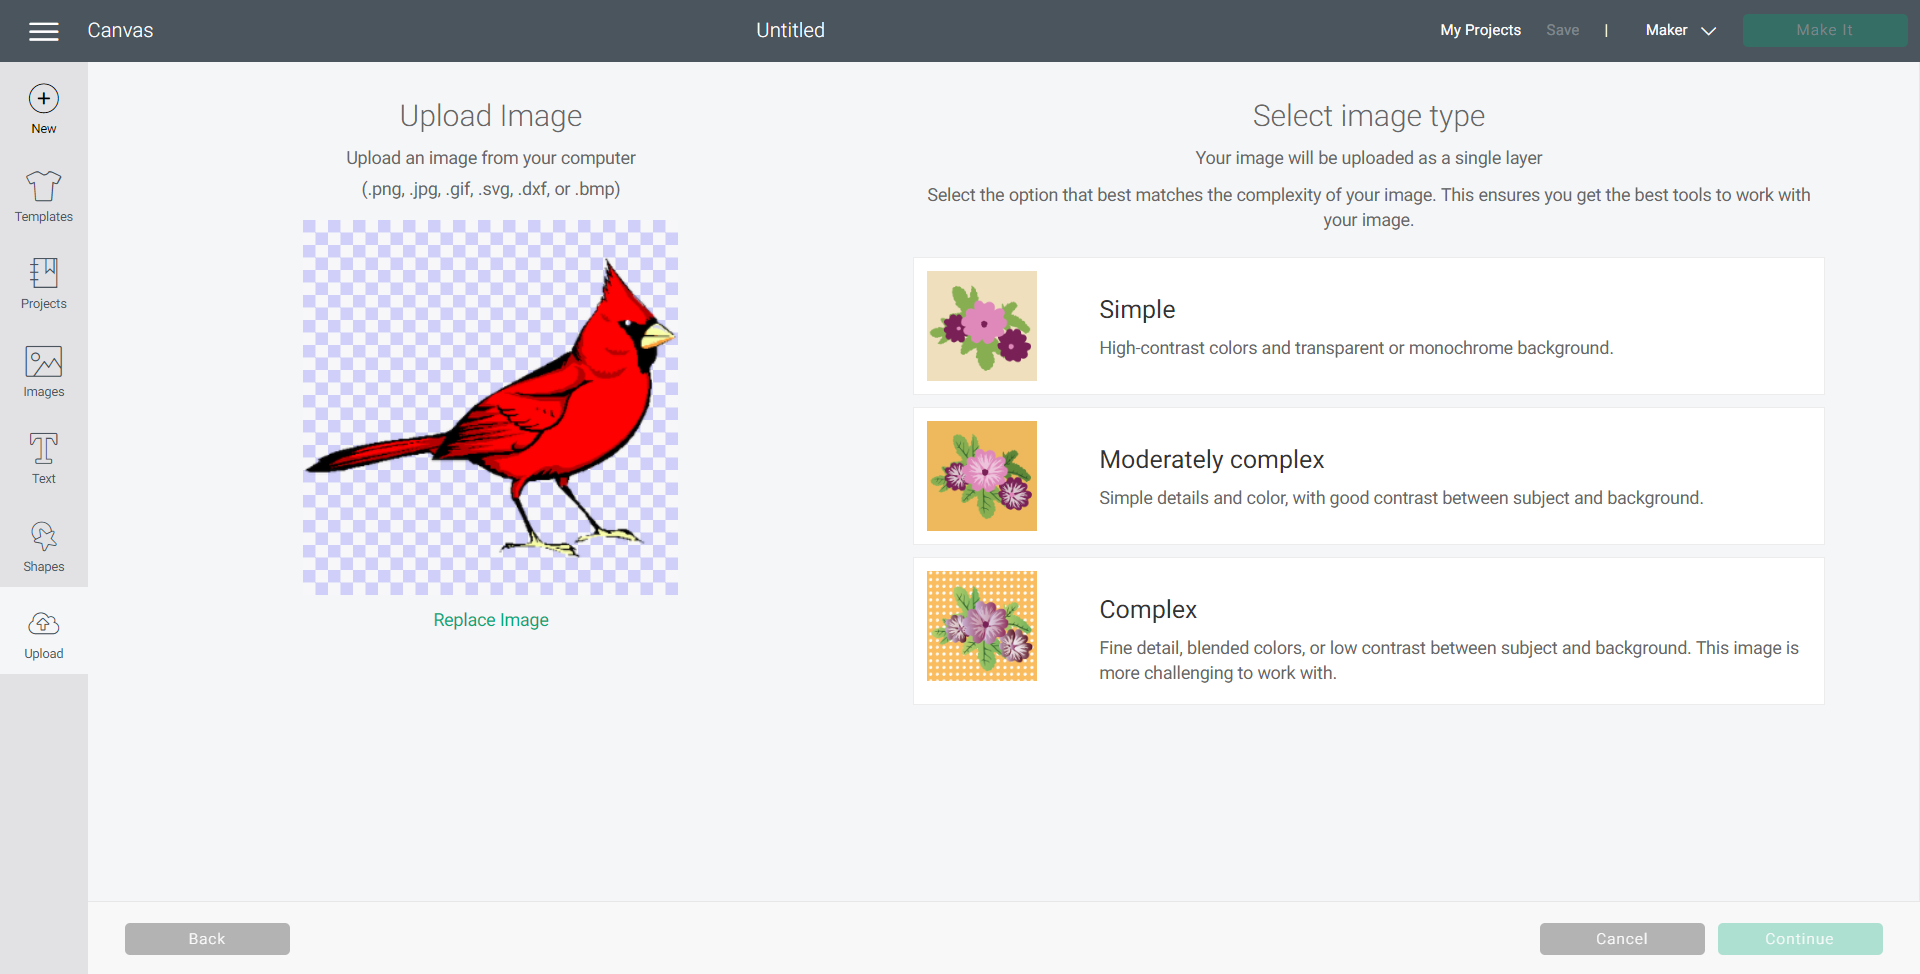
- First, select the .jpg, .gif, .png, or .bmp file you want to upload. Then choose Open in your file selector or drag and drop your file into the Cricut Design Space image upload window.
- Based on the details on your screen, decide whether your image is simple or moderately complex. Tap Continue.
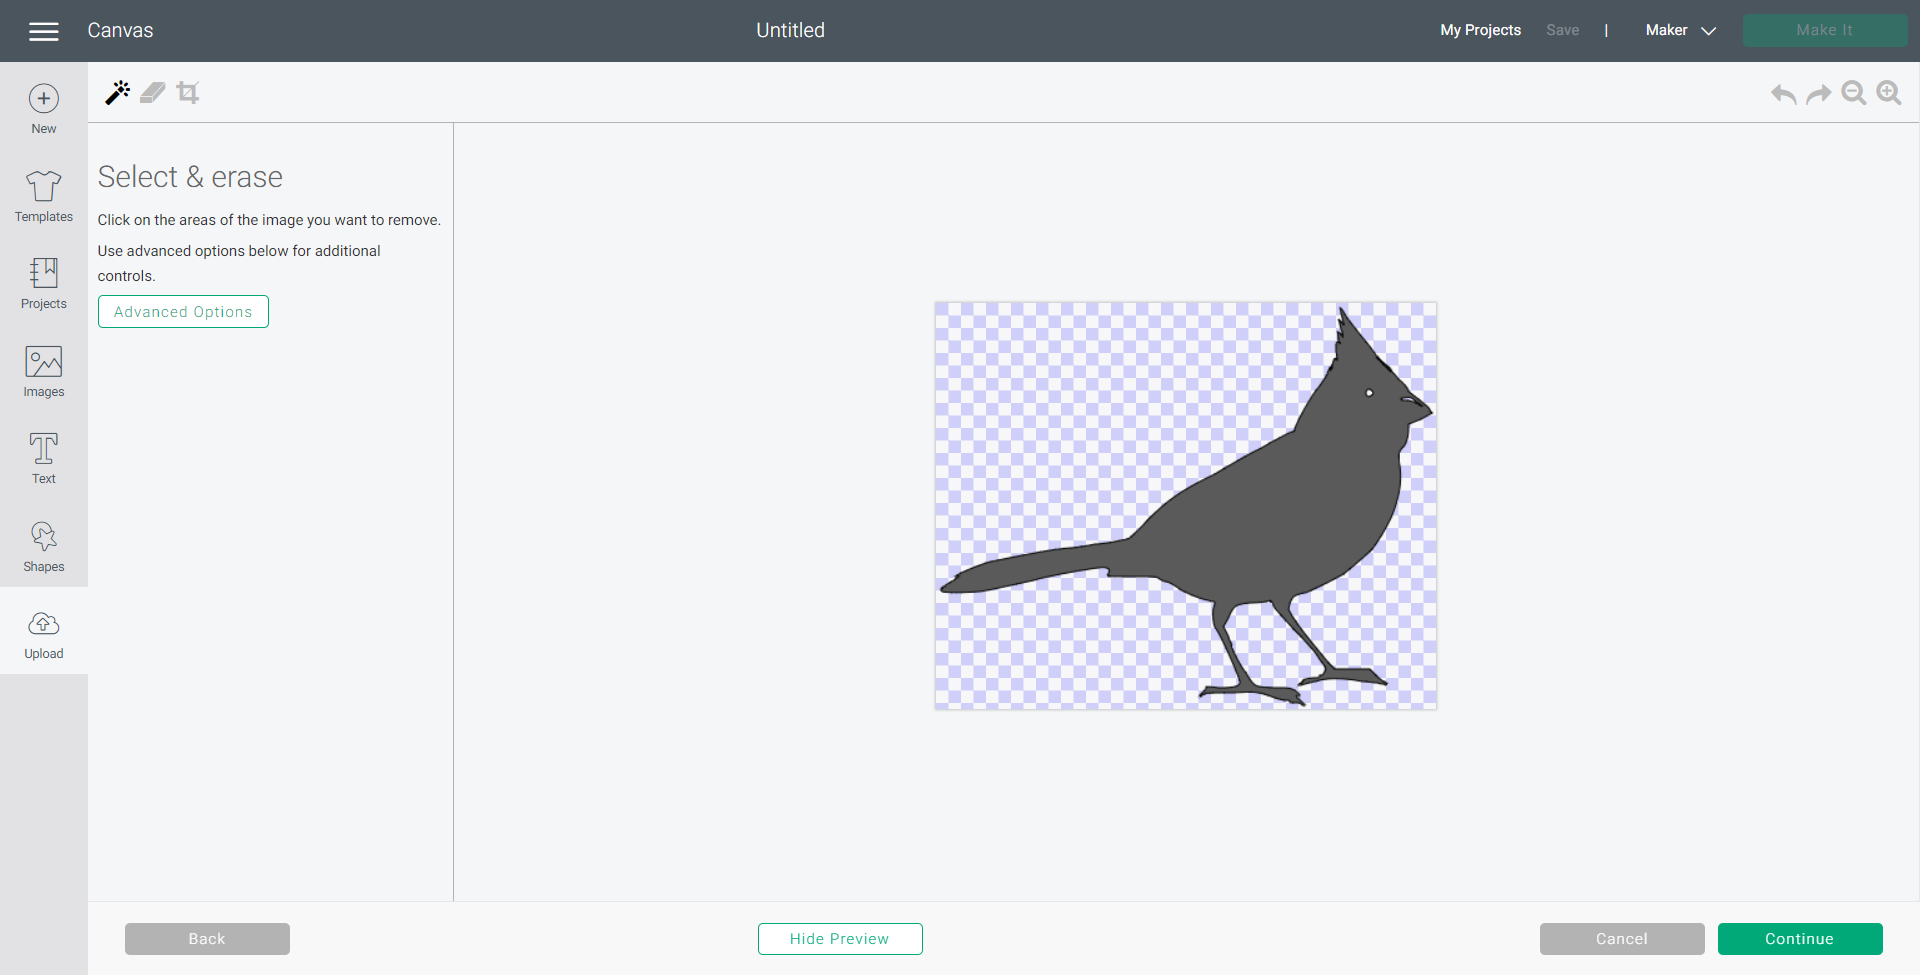
- Next, define the cut lines of the image. Use the Select and Erase, Erase and Crop tools to remove unwanted background and other areas. The checkerboard background shows areas that have been removed and will not be cut. The solid areas represent the image you’ll use on your design screen.

- After that, select Preview to see the cut size of the image. If your image does not seem as wanted, Hide Preview and continue editing your image until you’re satisfied with the preview. Once your image looks how you want it, choose Continue.
- Now, name the image and tag it for easy searching. Select to save the image as a Print Then Cut image or choose a cut image. Saving will keep your whole image, including interior colors and designs, and add it to your design screen as a Print Then Cut image. Saving will only keep your cut shape (interior designs will be removed). Then choose Upload.

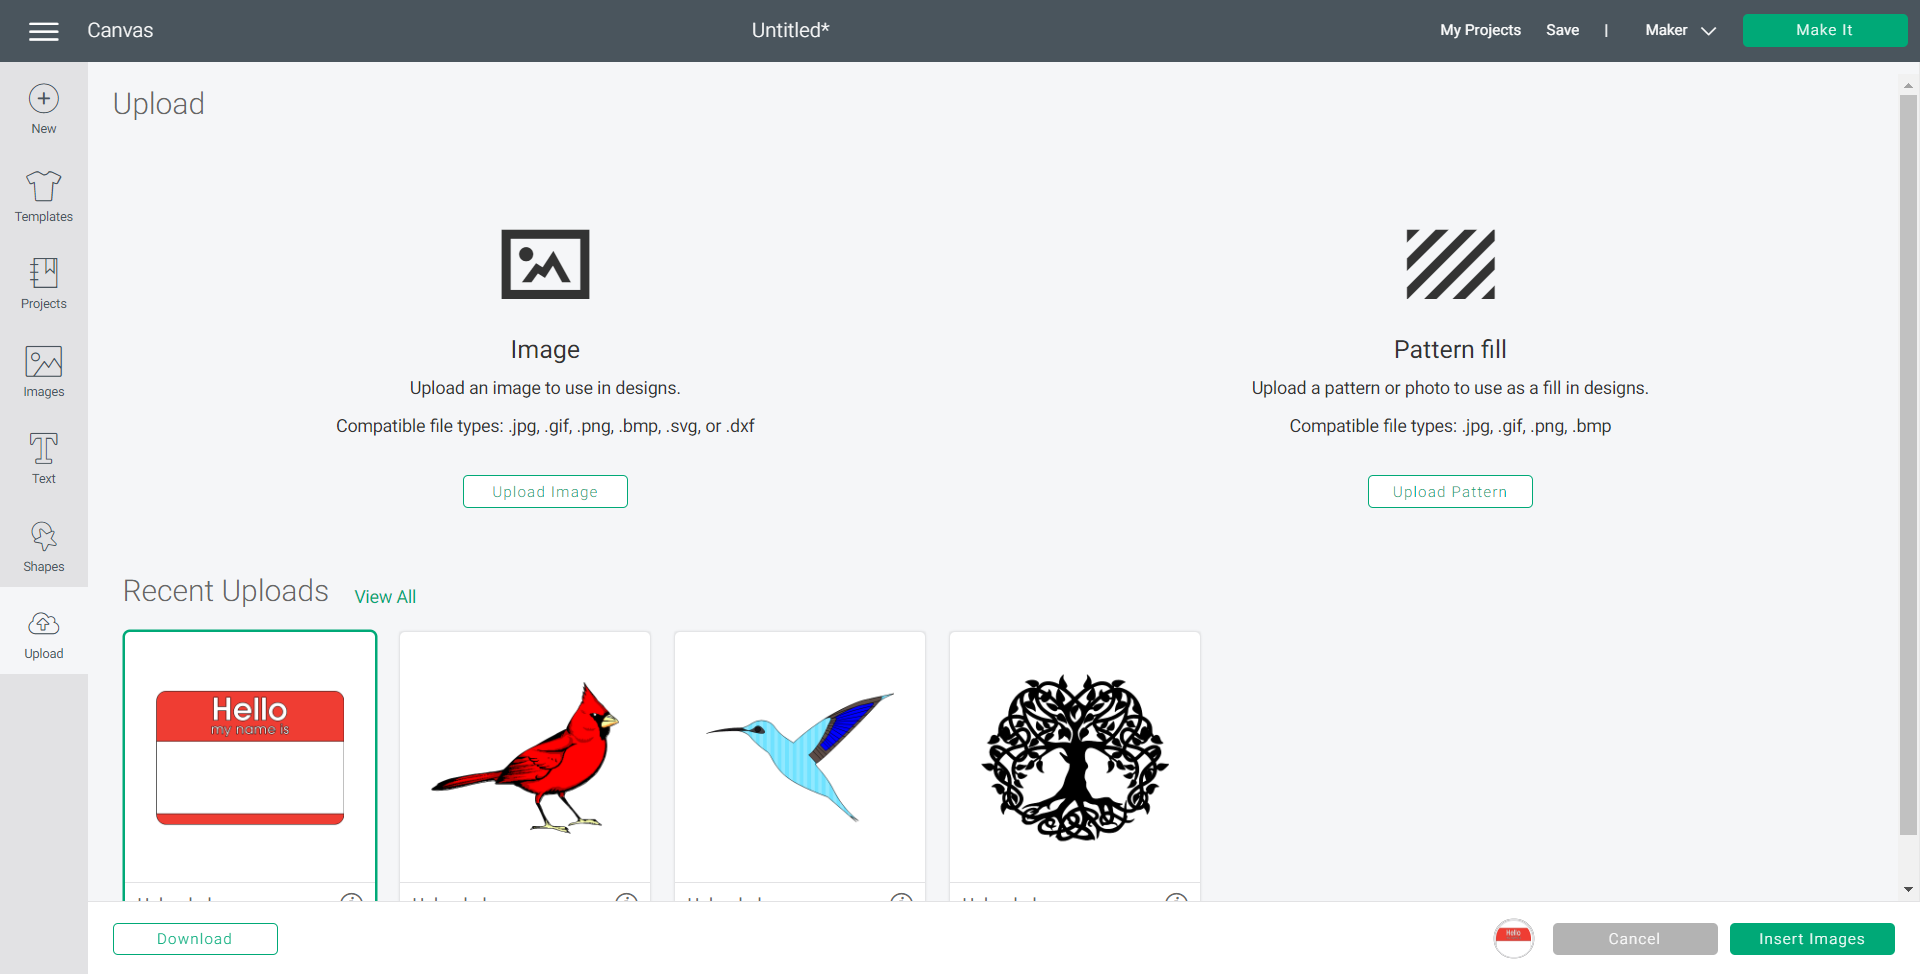
- Lastly, return to your upload screen. The new image will appear in your Uploaded Images library at the bottom of your screen. To upload images to Cricut project, tap the image to select it, then tap Insert Image to add the image to the design screen.

Option 2: Vector Image Upload
In order to upload images to Cricut Design Space, kindly follow the steps mentioned below:
- First, choose the .svg or .dxf file you want to upload. Then choose Open in your file selector or drag and drop your file into the Cricut Design Space image upload window.
- Next, name your image and tag it for easy searching. Then choose Upload.

- After that, return to your upload screen. The new image will appear in your Uploaded Images library at the bottom of your screen. To add an image to the design screen, tap your image to select it, then choose Insert Images to add it to the design screen.
- Vector images created with layers will appear on the canvas as a grouped image. If ungrouped, your image layers can be dragged and resized individually.
Visit: cricut.com/setup
Source: https://cricutdesignncut.blogspot.com/2022/08/how-to-upload-images-to-cricut-design.html